MIV Converter is a conversion software designed to comply with the MIV Standard v2 for representing heterogeneous objects. Its main features include heterogeneous object embedding—particularly geometric information processing of heterogeneous object models—and MIV conversion of point cloud models
This software is developed in C++17 using the Visual Studio 2022 Windows development environment.
It relies on OpenGL library functions for rendering and visualization.
To build and run this software, make sure the following tools and libraries are installed:
- Visual Studio
- OpenGL
- GLEW
- FreeGLUT
- GLM
- mpeg-pcc-renderer
- PYUV player
- Ensure that the OpenGL, GLEW, GLM and FreeGLUT libraries are correctly linked in your Visual Studio project. mpeg-pcc-renderer is utilized for rendering the generated point cloud sequence, while PYUV Player is used for rendering the generated MIV sequence.
This guide explains how to install OpenGL along with the FreeGLUT and GLEW libraries required for the project.
We have included the OpenGL library we are using in third-party-library folder.
Alternatively, you can install OpenGL manually.
This section provides the default file paths for the OpenGL libraries required for the project.
C:\Program Files (x86)\Windows Kits\10\Include\xx.x.xxxxx.x\um\gl
C:\Program Files (x86)\Windows Kits\10\Lib\xx.x.xxxxx.x\um\x64
The locations of the .dll files required for OpenGL installation are shown in the image. They can be placed in a local folder or copied to the system folder.
C:\Windows\System32
After opening the configured .sln file in Visual Studio, build the project to generate the executable file.
The software package includes the following key components:
- MIVconverter – Source code for the main application
- experiment – Experimental scripts and utilities for testing and evaluation
- data – Contains the datasets required by the software, including original MIV video frames such as chess, classroomvideo, and museum. In addition to the data, the folder also includes the GLSL global parameter files imageProcessingUniform.csv and parameters_hetro.csv, as well as brdfIntegrationMap.pfm, for environment-light image processing and object environment-light interaction.
*.\Experiment*

*.\data*

.\data\chess

To ensure proper operation of this software, users must strictly follow the required folder structure, particularly regarding the placement of the data and JSON data description files. If the relighting function is used, the .raw files must also be placed in the specified directory.
The datasets required by this software can be downloaded from:
- Public datasets: MPEG Content Database
- Restricted datasets (e.g., museum, loot, redandblack, longdress, soldier): available with permission from the MPEG Expert Group
- 3D models (.obj) for heterogeneous objects: Textured Mesh Repository
To enable environment light rendering, the software includes two .csv files in the data folder that define GLSL uniform parameters, and it implements a set of GLSL shaders based on https://www.gsn-lib.org/, which are available in the shader folder. These parameters and shader programs support GLSL image processing techniques such as importance sampling and the interaction between environment map and heterogeneous objects.
The software uses the renderer included in the MIV reference implementation to generate environment maps.
Preprocessed environment light images are stored in the dataset folder, sharing filenames with the corresponding .json files but using the .raw extension.

After configuring the experimental files, run the program. The program operates in two modes. When the mode code is set to zero, a simple OpenGL rendering window is launched, displaying the MIV image rendered by the current camera along with the heterogeneous object. The program provides basic keyboard controls that allow the user to move the heterogeneous object within the MIV space.
The A and D keys move the object along the x-axis. The W and S keys move it along the z-axis. The Q and E keys move it along the y-axis.
After positioning the object, press the ‘c’ key to confirm. The file ModelPositionMatrix.txt is saved, and automatic capture begins. During automatic capture, the OpenGL window will automatically switch between cameras to record images of the object from multiple angles, collecting both texture and geometric information. Each automatic capture cycle corresponds to one frame, and the program will close automatically upon completion.
Optionally, set the relighting flag to 1 to enable IBL, or to 0 to disable it.
If the user wishes to composite the captured image with the original frame, the auto composition parameter can be set to 1 in the execution parameters. The composited MIV data will then be saved in the compositionResult folder.
To generate multi-frame dynamic MIV images, the user can specify the index of the first frame of the model and the filename in the following format: soldier_fr%04d.obj. The system then recognizes the input as a multi-frame dynamic object.

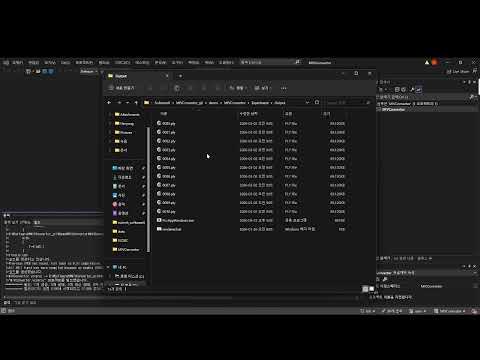
With the widespread use of point cloud data, this program also provides MIV conversion functionality for point cloud datasets. Setting the mode code to 1 enables the program to read the original MIV data and perform point cloud reconstruction. Unlike mode code 0, this mode does not launch an OpenGL window for scene rendering or composition. Therefore, only the output path (the Output folder) needs to be specified in the parameters, and the composited results path (the CompositedResults folder) does not need to be defined. To perform multi-frame dynamic point cloud conversion, the user simply enters the output frame number and sets the mode to 1.
The .bat files serve as example scripts for running the software, providing users with pre-configured program parameters. Users can easily run the program’s default functions by simply double-clicking the executable .bat file in the local folder.
.\MIVConvertor.exe 0 ".\data\chess\\" ".\data\chess\Chess.json" "_texture_2048x2048_yuv420p" "_depth_2048x2048_yuv420p" "_entity_2048x2048_yuv420p" "10le" "16le" ".\data\RWT121\CHASSEUR.obj" ".\Output\\" 1 ".\CompositedResults\\" data/chess/Chess.raw 0 1
.\MIVConvertor.exe 0 ".\data\chess\\" ".\data\chess\Chess.json" "_texture_2048x2048_yuv420p" "_depth_2048x2048_yuv420p" "_entity_2048x2048_yuv420p" "10le" "16le" ".\data\redandblack\redandblack_fr1450.obj" ".\Output\\" 1 ".\CompositedResults\\" data/chess/Chess.raw 0 10 1450 1

@echo off
setlocal EnableDelayedExpansion

FOR /L %%i IN (0,1,8) DO (
    rem set /A frame=1450+%%i

    .\MIVConvertor.exe 0 ".\data\chess\\" ".\data\chess\Chess.json" ^
    "_texture_2048x2048_yuv420p" "_depth_2048x2048_yuv420p" "_entity_2048x2048_yuv420p" ^
    "10le" "16le" ".\data\redandblack\redandblack_fr%%04d.obj" ^
    ".\Output\\" 1 ".\CompositedResults\\" data/chess/Chess.raw %%i 10 1450 1
)

endlocal
FOR /L %%i IN (0,1,3) DO (
.\MIVConvertor.exe 1 ".\data\chess\\" ".\data\chess\Chess.json" "_texture_2048x2048_yuv420p" "_depth_2048x2048_yuv420p" "_entity_2048x2048_yuv420p" "10le" "16le" ".\Output\\" %%i >> log.txt
)
The data generated by this software has been tested for encoding and decoding using the current MIV reference software. For the configuration of the MIV reference software, please refer to the configuration information provided on the official website, or to the content provided below.
Ensure the following prerequisites are installed:
-
A C++17 or newer compiler toolchain
-
Python 3.10 or newer
In Visual Studio, clone the repository: git clone -b v23.0 --single-branch https://gitlab.com/mpeg-i-visual/tmiv.git
Open the x64 Native Tools Command Prompt.
Navigate to the directory where the repository was cloned.
python -m venv venv
venv\Scripts\activate    # On Windows
python -m pip install --upgrade pip
pip install -r requirements.txt
python scripts/install.py cl-release
Reference: https://gitlab.com/mpeg-i-visual/tmiv
After cloning, the repository directory is named tmiv. Inside the tmiv directory, create a new folder named in. If you are using the classroomvideo sequence, create a subfolder named according to the dataset code (for example, A01) inside the in directory.
.\tmiv\in\A01
Place the dataset files inside the .\tmiv\in\A01 directory. Ensure that the dataset filenames follow the required naming convention, such as:
v0_depth_2048x2048_yuv420p16le.yuv v0_texture_2048x2048_yuv420p10le.yuv
Reference: https://gitlab.com/mpeg-i-visual/tmiv/-/blob/master/doc/running.md
.\out\install\cl-release\bin\TmivEncoder.exe -n 1 -s B02 -f 0 -c .\config\ctc\miv_main_anchor\A_1_TMIV_encode.json -p configDirectory .\config -p inputDirectory .\in -p outputDirectory .\out
.\out\install\cl-release\bin\vvencFFapp.exe -c .\config\ctc\miv_main_anchor\A_2_VVenC_encode_tex.cfg -i .\out\A1\B02\RP0\TMIV_A1_B02_RP0_tex_c00_2048x4352_yuv420p10le.yuv -b .\out\A1\B02\RP2\TMIV_A1_B02_RP2_tex_c00.bit -s 2048x4352 -q 29 -f 1 -fr 30
.\out\install\cl-release\bin\vvencFFapp.exe -c .\config\ctc\miv_main_anchor\A_2_VVenC_encode_tex.cfg -i .\out\A1\B02\RP0\TMIV_A1_B02_RP0_tex_c01_2048x4352_yuv420p10le.yuv -b .\out\A1\B02\RP2\TMIV_A1_B02_RP2_tex_c01.bit -s 2048x4352 -q 29 -f 1 -fr 30
.\out\install\cl-release\bin\vvencFFapp.exe -c .\config\ctc\miv_main_anchor\A_2_VVenC_encode_geo.cfg -i .\out\A1\B02\RP0\TMIV_A1_B02_RP0_geo_c00_1024x2176_yuv420p10le.yuv -b .\out\A1\B02\RP2\TMIV_A1_B02_RP2_geo_c00.bit -s 1024x2176 -q 9 -f 1 -fr 30
.\out\install\cl-release\bin\vvencFFapp.exe -c .\config\ctc\miv_main_anchor\A_2_VVenC_encode_geo.cfg -i .\out\A1\B02\RP0\TMIV_A1_B02_RP0_geo_c01_1024x2176_yuv420p10le.yuv -b .\out\A1\B02\RP2\TMIV_A1_B02_RP2_geo_c01.bit -s 1024x2176 -q 9 -f 1 -fr 30
- Subfolders R0 and R2 are user created.
.\out\install\cl-release\bin\TmivMultiplexer.exe -n 1 -s B02 -r RP2 -c .\config\ctc\miv_main_anchor\A_3_TMIV_mux.json -p configDirectory .\config -p inputDirectory .\out -p outputDirectory .\out
.\out\install\cl-release\bin\TmivDecoder.exe -n 1 -N 1 -s B01 -r RP1 -v v11 -c .\config\ctc\miv_main_anchor\A_4_TMIV_decode.json -p configDirectory .\config -p inputDirectory .\out -p outputDirectory .\out
The following script decodes views (v0–v9) at RP2 using TmivDecoder.exe.
for /L %%i in (0,1,9) do (
    .\out\install\cl-release\bin\TmivDecoder.exe ^
        -n 1 -N 1 ^
        -s B02 ^
        -r RP2 ^
        -v v%%i ^
        -c .\config\ctc\miv_main_anchor\A_4_TMIV_decode.json ^
        -p configDirectory .\config ^
        -p inputDirectory .\out ^
        -p outputDirectory .\out
)
Output Files
The following decoded files at RP2 will be generated:
A1_B02_RP2_v0_geo_2048x2048_yuv420p16le.yuv
A1_B02_RP2_v0_tex_2048x2048_yuv420p10le.yuv
...
A1_B02_RP2_v9_geo_2048x2048_yuv420p16le.yuv
A1_B02_RP2_v9_tex_2048x2048_yuv420p10le.yuv
Renaming Files
Rename geo → depth
for /L %%i in (0,1,9) do (
  for %%f in (*A1_B02_RP2_v%%i_geo*) do (
    set "name=%%~nxf"
    set "newname=!name:A1_B02_RP2_v%%i_geo=v%%i_depth!"
    ren "%%f" "!newname!"
  )
)
Rename tex → texture
for /L %%i in (0,1,9) do (
  for %%f in (*A1_B02_RP2_v%%i_tex*) do (
    set "name=%%~nxf"
    set "newname=!name:A1_B02_RP2_v%%i_tex=v%%i_texture!"
    ren "%%f" "!newname!"
  )
)
After renaming, place the files in the renderer input directory.
.\out\install\cl-release\bin\TmivRenderer.exe ^
    -s B02 ^
    -n 1 -N 1 ^
    -f 0 ^
    -r R0 ^
    -v center ^
    -c config\ctc\best_reference\R_1_TMIV_render.json ^
    -p configDirectory config ^
    -p inputDirectory in ^
    -p outputDirectory out
Output File
The following center-view rendered file will be generated:
R2_B02_R0_center_tex_4096x2048_yuv420p10le.yuv
To disable the inpainter, edit the "R_1_TMIV_render.json" file as shown below.
    "Inpainter": {},
    "NoInpainter": {},
    "InpainterMethod": "NoInpainter",
Build the following conversion tool to convert a rendered YUV file into an RGB raw file.
Reference: https://github.com/liumei2012/YUV2RGB.git
Use the rendered YUV file as the first parameter:
YUV2RGB.exe R2_B02_R0_center_tex_4096x2048_yuv420p10le.yuv Chess.raw
Then copy the generated file to the data/chess/ directory (e.g., data/chess/Chess.raw) and set the software parameters as follows:
data/chess/Chess.raw