The demos for the marquee, designed primarily by Enzo Mclauchlin for the IEEE 2025/26 arcade machine project.
- PlatformIO
- A code editor of your choice (I would reccomend VSCode, due to it's PlatformIO extension)
- (OPTIONAL BUT HIGHLY RECCOMENDED) Espressif Systems - ESP-IDF (Seriously, you will be very frustrated if you don't install this before writing your demo(s). I know from experience; the amount of syntax errors I had was brain-breaking) (also available as a VSCode extension)
- ESP32
- Good data cable for ESP32 to PC
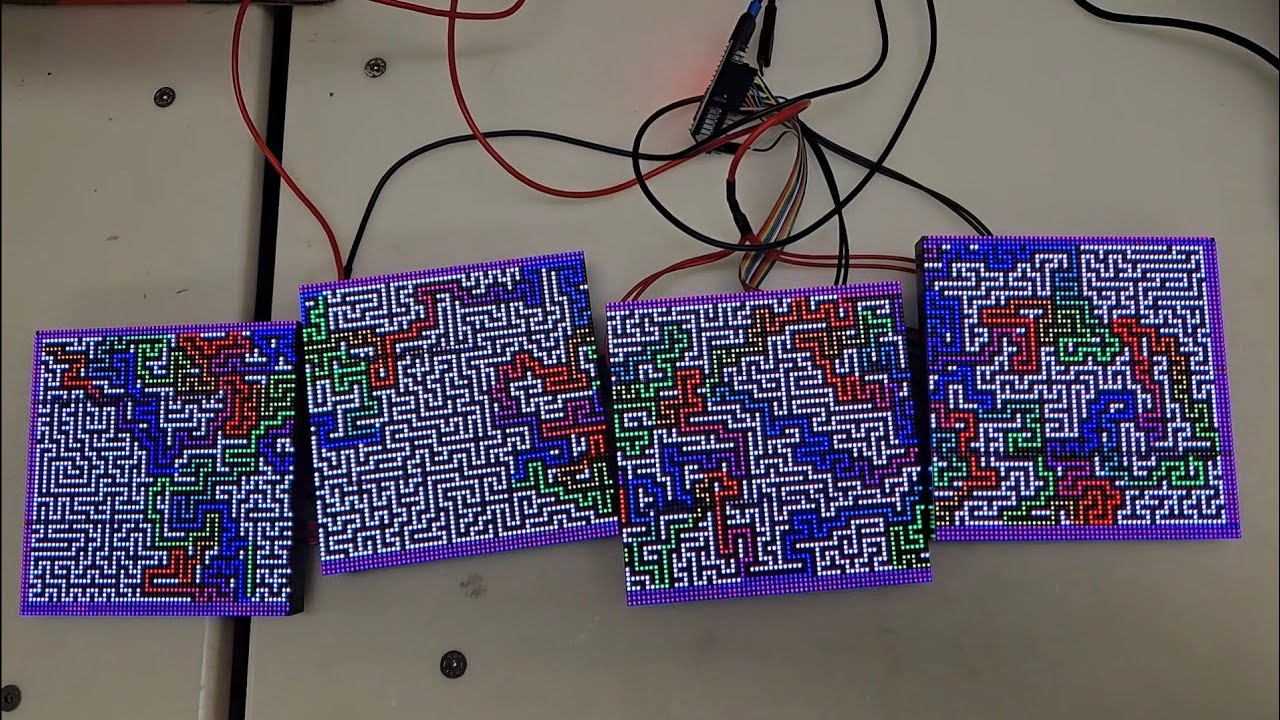
- 256x64 HUB75 LED matrix panel, or (in our case) four 64x64 matrix panels wired in series
- Wires for ESP32 to HUB75 connection
- Appropriate power supply for HUB75 panels
Ensure that your ESP32 is properly plugged into your matrix panels, and if you are using multiple matrix panels and wiring in series then wire them in series beforehand. Waveshare details how to go about this in their page detailing their matrix panels under "Working with ESP32".
Technically, there is baked-in support on most demos for panels which are not of 256x64 dimensions. This is more buggy and untested, though I have reason to believe that panels that maintain a height of 64 pixels will generally work across the board. To accomodate a different display side, upon cloning the project, change PANEL_RES_X, PANEL_RES_Y and PANEL_CHAIN (that being the number of panels changed, and the X and Y definitions being for a single panel in that chain) accordingly to your specifications.
If you are using Windows, you may need to find the required driver for your matrix panel. If you are using Linux, most matrix panels should function without the need for any drivers. Ensure you are using a good data cable for uploading the code from your PC to the ESP32.
First open command prompt, change to your desired directory, and clone the repo:
git clone https://github.com/UBIEEE/ARCADE-MARQUEE-MANAGER.git
cd ARCADE-MARQUEE-MANAGER
When you are ready to build the project, you can do so from VSCode with "Build" or in that same command prompt with:
pio run
The same applies with uploading to the ESP32, either through VSCode or with this command in the same command prompt:
pio run -t upload
And if you want to open a serial monitor:
pio device monitor
include/       → (unutilized)
lib/           → External libraries (MIT licensed)
src/           → The main code for the project
test/          → (unutilized)
platformio.ini → Project configuration (don't touch unless you have to)
├───demos       → Contains all demos, header files for said demos, and the utilities folder
│ ├───output    → (unutilized)
│ └───utilities → Contains the demo structures, as well as commonly used functions across demos
└───output      → (unutilized)
I have made a concentrated effort to make contributing your own demo for this project as simple as possible, though it is still not so obvious. This will walk you through the steps of adding your own demo to the project, and I reccomend reading it through before creating your demo.
For congruency and simplicity, name these files the same thing, that being the name of your demo. You effectively need to code your demo in C++, you will suffer if you program in anything else for this project.
In the .h file, you will set up neccesary aspects of your demo. Here is a template:
#ifndef <CAPITALIZED NAME OF FILE>_H
#define <CAPITALIZED NAME OF FILE>_H

#include <ESP32-HUB75-MatrixPanel-I2S-DMA.h> //You always need this for ESP32 HUB75 intercommunication!!
#include "../definitions.h" //You always should use these definitions instead of "random numbers"!!

//You can define a struct here if you want for use in the demo, for example:
//struct Coord {
//    uint16_t x;
//    uint16_t y;
//};

// Your function definitions must be placed below as you write them if you want them to be accessible by demo.cpp
//void start_my_demo();

#endif
The functions which shall be accessible from demo.cpp must not contain ANY parameters. Until further notice, there is no way to pass variables into a function which you want to add to a Demo struct. I will go further into detail soon on how to "get around" this if you desire to do so.
Alright, now it's time to write.
First, place this into your .cpp file:
#include "<name of header file>.h"


extern MatrixPanel_I2S_DMA *dma_display;
extern uint16_t myBLACK; //This is a nice-to-have, it is a definition for the color you will (likely) use most commonly.
I will make an effort not to jump ahead here, but as simply as I can put, there are three main types of functions that you can write here (as well as helper functions of course). These types of functions will be called later on in specific manner, so it is pertinent you think about what kind of function you are writing before you do. Here are the categories:
The start of your demo. When your demo is selected to run, this will run once before anything else. This can be used to reset the state of your demo, setting variables to start as needed, resetting your exit condition, whatever it might be that you need to do.
The catch of your function. By default there is a timer in the Demo struct, and this is unremovable. However, if you desire to make an exit function, you can set your timer to be a very long time (I will get into this more later when I discuss that struct). Your exit function will run repeatedly before your "primary" function starts and must return true if it intends to exit the demo, and return false otherwise. You can define a static boolean which will act as your exit condition, update it in your primary loop (see below) and have the exit function be tripped by this boolean.
The "meat" of your demo. When your demo is selected to run, after your reset function is run (if you have one), this function will repeatedly run until either the set time for your demo elapses or your exit condition is met. By repeatedly, I mean as fast as the ESP32 can possibly run through your code, unless you use Delay(ms). This can be used to limit the framerate / the speed that the demo runs at.
If you desire, you can also just loop in the function itself in the first call, as can be seen in maze.cpp. I find it easier to use the optional functions and the non-stop looping, especially if you just want your function to end it's loop after the timer elapses, but this is possible too. Just be sure your function does NOT enter an infinite loop and has an exit condition.
-
There are definitions in definitions.h, and if you want your code to function with every possible program, here's how to do so:
PANEL_TOTAL_Xis your screen width, andPANEL_RES_Yis your screen height. I would generally speaking advise against usingPANEL_RES_X, this is the resolution of one panel, not all of them. As you may be able to tell, there is currently no support for chaining panels below each other, only side to side. That is the reason for this somewhat odd nomenclature. -
X and Y grow downwards. This means that the top left pixel is (0, 0), and the bottom right is (255, 63). This was not my choice, and I dislike it too. Try not to forget this, it's a very easy mistake to make and an annoying one to fix.
-
Colors are defined as follows, using black as an example:
dma_display->color565(0, 0, 0) -
By typing
dma_display->in a code editor such as VSCode, you will see many different functions, to type them and what they do. Some important ones aredrawPixelandfillScreen. I encourage you to look through other written demos to get an idea of some of the things you can do with the MatrixPanel_I2S_DMA library! -
This library does not automatically clear the screen. It is rudimentary. If you draw a circle at a location, the screen will stay that way until you manually remove that circle by writing over it with black. There is no built-in layering.
-
Frustratingly, there is no getPixel. When you write a pixel to the display, it's out there and it's not coming back. If you want to modify screen state based upon what is currently being displayed, you need to make a buffer and do an O(n^2) operation of writing all pixel values to that buffer as you do everything you do. If you want an example of me doing this successfully, take a look at conway.cpp. For individual pixel writing this is not a big deal, but for drawing text or shapes, you're largely out of luck without an insane amount of overhead. Good luck and get creative.
-
Define your globals statically and within your .cpp file, not the .h file! Don't clog up the global name space of the entire project!!!
Alright, now that you're done, you're almost there! You will see in the demo.h file a list formatted in this way:
//Place your demo's .h file in here!!
#include "../linerocker.h"
#include "../discoball.h"
#include "../conway.h"
...
Simply add your own .h file in as such:
#include "../<name of header file>.h"
Final step! See demo.cpp, it will have a list such as the following:
std::vector<Demo> demos = {
    Demo(startIEEE,      10000u,  nothing,        noexitcond),
    Demo(startUB,        100000u, nothing,        UBexitCond),
    Demo(discoBall,      10000u,  resetDiscoBall, noexitcond),
    Demo(lineRocker,     10000u,  nothing,        noexitcond),
...
Simply place your demo inside this in the following format:
Demo(demo_loop, time_in_ms, optional_reset_func, optional_exit_func)
And that's it! You're ready to test your function!
Helpful quick starts and guides:
mrcodetastic - ESP32 HUB75 Features and (better) Quick-Start Guide